1. Prepare Environment
download and install:
11. [Node.js](https://nodejs.org/en/)
2 2. [Git](https://git-scm.com/)
If your computer already has these, congratulations! You can skip to the Hexo installation step.
If not, please follow the following instructions to install all the requirements.
Verify that if the installation is complete:
1git version
2node -v
3npm -v
2. Create a new file folder
I opened my Data disk and create a new folder which will be used to store the data of my blog.
So, I named it "Blog". Obviously.
Then I open the cmd window in this folder and operated follow the conduction of <hexo.io> step by step.
1$ npm install hexo-cli -g
2$ hexo init blog
3$ cd blog
4$ npm install
5$ hexo server
you might be meet some problem from that. When I installed this, I found I cannot install...
That's because I didn't add it all to PATH and that made me confused for a long time.
3. Add Path
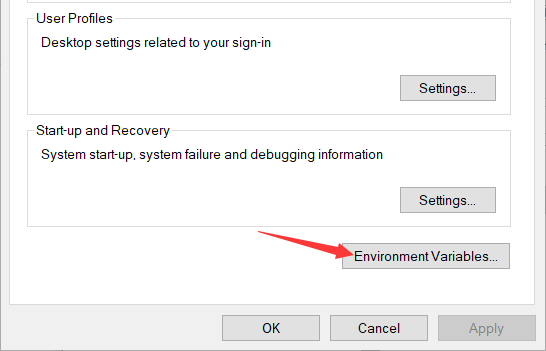
If you ask how to add a path. well, you need open properties of your This PC then go to the left-up corner click Advanced system setting .

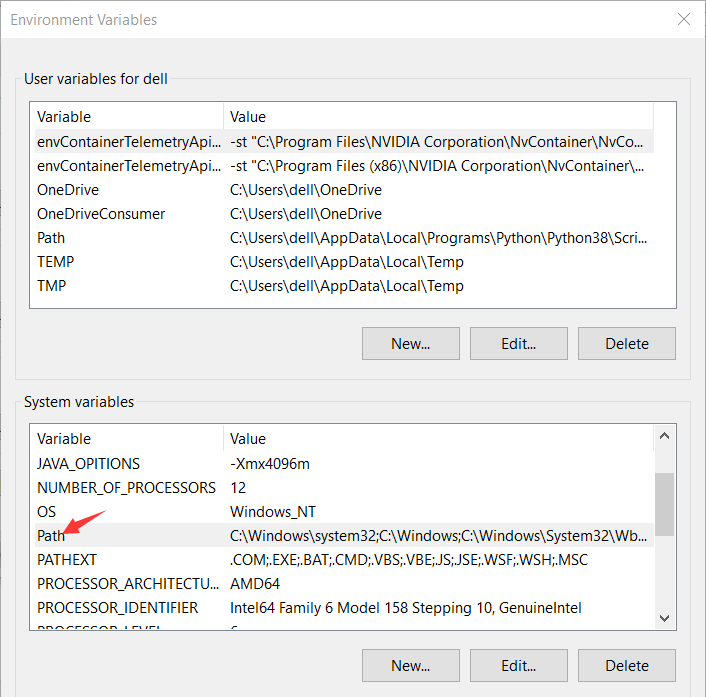
After that, go to the Environment Variables

click on the System Variables and add Path


4. Hexo Initialization
Once Hexo is installed, run the following commands to initialize Hexo in the blog
1$ hexo init blog
2$ cd blog
3$ npm install
Finished initialization, here’s what my blog folder looks like:
1.
2├── _config.yml
3├── package.json
4├── scaffolds
5├── source
6|   ├── _drafts
7|   └── _posts
8└── themes
Up to now, the construction of blog was completed. I used command below and searched http://localhost:4000, then I saw the preview effect of my blog:
1hexo s5. Login my Github and create a new repository
I already had a account of Github so I needn't register again.
The only thing I need notice is that the Repository name must follow the frame username.github.io and username must be the same as your real username in Github.
I met a problem here cause I didn't follow this rule.
6. Set SSH Key
I already set it, so I just record some things important here.
1git config --global user.name "username"
2git config --global user.email "email"
3ssh-keygen -t rsa -C "email"
press the Enter key 3 times...
1ssh -T git@github.comThen add the key in your Github setting
7. Upload to Github
7.1. Check the link of Repository (SSH or HTTP)
btw, I used SSH.
7.2. Open the file named "_config.yml" in basic folder blog and find out "deploy"
1deploy:
2    type: git
3    repo:  ....the link of Repository (SSH or HTTP)
4    branch: master
7.3. install a plugin hexo-deployer-git
1npm install hexo-deployer-git --save7.4. Upload
1hexo g -d